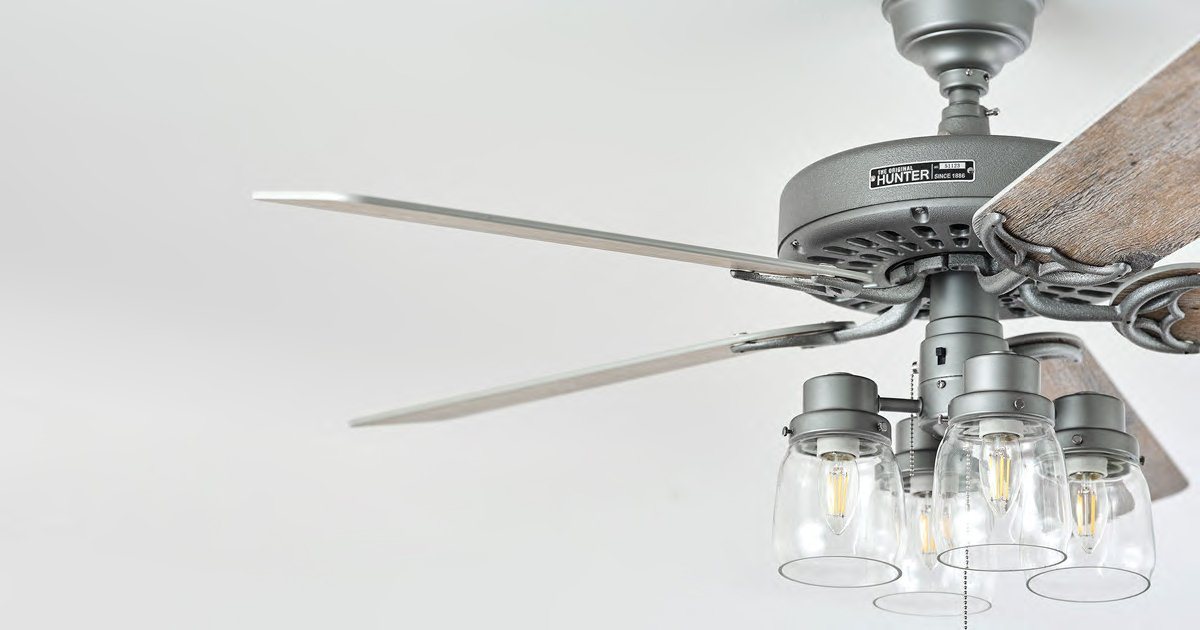
The Hunter Original® fans have been a fan-favorite (pun always intended) from the beginning. To celebrate our 135th anniversary of the Hunter Original, we released a new finish to add to the popular lineup.
The Hunter Original fan launched in 1906, crafted for durability with cast iron materials and a motor that runs on an oil bath lubrication system. While other Hunter fans don’t require oil, the Original is the exception because its unique motor system requires the main bearings to stay lubricated at all times for quiet operation.
It’s a system that’s worked for more than 135 years. That being said, adding and replacing the oil in the Original ceiling fan is important. Here’s an easy guide to show you how to oil the ceiling fan.
How to Oil a Hunter Ceiling Fan During Installation
Your fan has been shipped without oil in the motor so you will need to add it before the first use. You'll find a tube of our Hunter high-grade SAE 10 non-detergent oil packaged in the hardware bag. It’s important to use Hunter’s specific oil, as the wrong oil can damage the fan.
Supplies Needed to Oil the Hunter Original Ceiling Fan
- Hunter oil specifically for the Original model
- Scissors for cutting the tip on the tube of oil
- Pipe cleaner
- Hunter Original Fan product manual
- Step ladder
- Screwdriver
Oiling the Anniversary Model (51123)
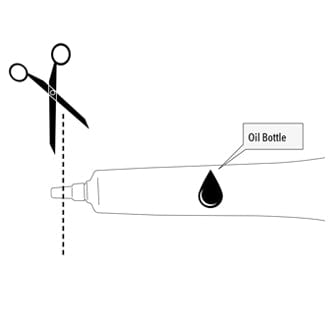
1. Remove the oil cap and cut the tip off the end of the tube.
2. Lift the cap of the oil hole to the oil reservoir at the top of the fan.
3. Place the tube into the oil hole and gently squeeze the tube to empty the oil into the fan's reservoir.
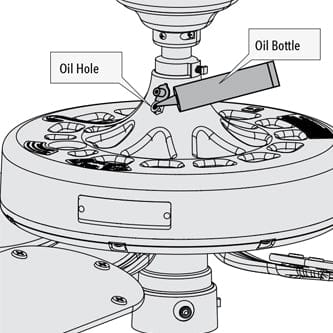
4. Check the oil level immediately after filling the reservoir to ensure it’s filled properly (see instructions on how to check your fan’s oil level below).
5. Replace cap once the reservoir is full.
TIP: To avoid overflowing during filling, add a third of the oil from the tube at a time. Pause for 30 seconds between each third to allow the oil to settle in the fan. Be sure to add all of the oil in the tube to the fan.
How to Lubricate a Ceiling Fan When Moving its Location
If you’re moving your Hunter Original fan, you’ll need to remove the existing oil to avoid spilling it. You can take and use your Original’s hanging system in the new location, but if it needs replacing, you can use our relocation kit.
After reinstallation, follow the above steps for refilling the oil in the Original or Anniversary edition fan.
How to Check the Oil Level in Your Hunter Original Fan
To maintain peak performance, our experts recommend you check the oil level in your fan every 1-5 years, even if it seems to be operating as normal.
If your ceiling fan is making noise, there could be several reasons, one of which is needing oil.
Check the oil level using these simple steps:
- Make sure fan is powered off.
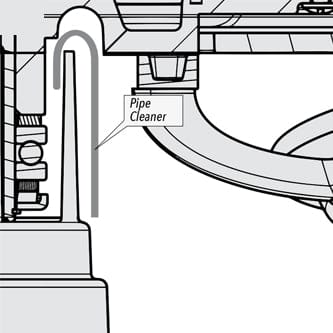
- Bend a ½-inch hook on one end of a basic pipe cleaner.
- Dip the hook into the oil reservoir.
- Remove the pipe cleaner and check to see if the oil has touched the end of the hook.
- If the pipe cleaner has oil on it, that means the reservoir is full.
- If there’s no oil on the end, add more oil until you can repeat Step 4 and see oil on the pipe cleaner.
Where to Get Oil for Your Hunter Original
Our 1 oz. tube of Hunter high-grade SAE 10 non-detergent oil is specifically designed to maintain the unique oil bath lubrication system of the Hunter Original® ceiling fans for a lifetime of quiet operation. Using the wrong oil can damage the fan, so be sure to only use our oil specifically made for the Hunter Original fan to keep it running smoothly. Check out hunterfan.com to purchase your oil.
Maintaining the oil level in your Hunter Original fan doesn’t require much time or effort and it provides long-lasting, quality performance you can count on to deliver the comfort you want.
